An IoT product combines device hardware, firmware, connectivity, and often a cloud application. A bench prototype may demonstrate all four while leaving power consumption, manufacturing, updates, and recovery unresolved. Getting to production means testing those conditions deliberately.
For example, you might find that a product contains a single real-time microcontroller for the main application, a Bluetooth module, Wi-Fi module and maybe even a graphical user interface module for interacting with the user, as well as a set of sensors, actuators, motors and periphery.
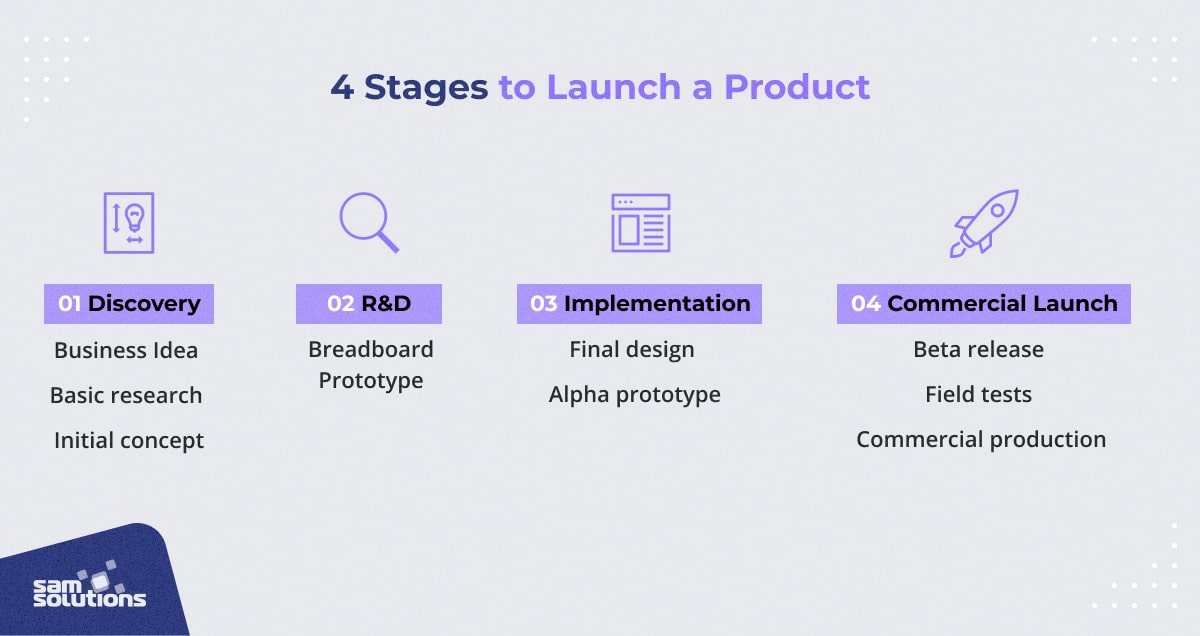
Technology products are highly dependent upon developing and integrating embedded systems together to create the end product. Whether you are a first-time tech entrepreneur, or a seasoned one, there are four main stages to the IoT product development process that the innovator needs to take in order to successfully bring their product from concept to production (which can be seen below):
- Note: This is the optimal approach – but each project is different and may require adjustments as necessary.
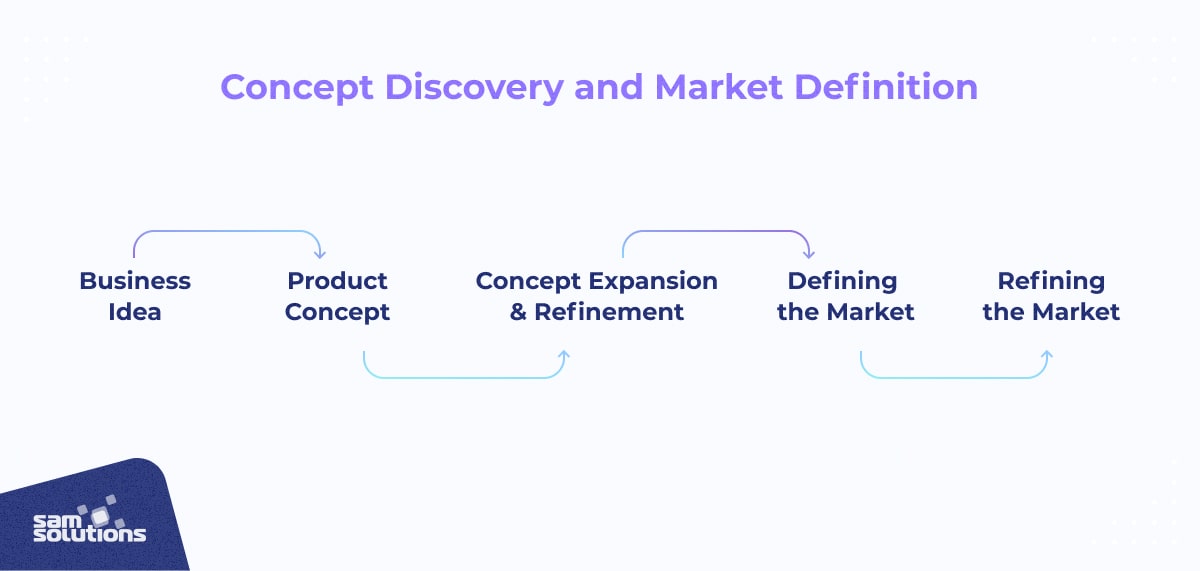
Stage #1 – Concept Discovery and Market Definition
Describe a specific user task before selecting hardware. For a remote temperature logger, define who reads the measurement, how quickly an alert is needed, what happens without connectivity, and who replaces the battery. Those answers influence the whole design.
Expanding the concept often requires that the entrepreneur identify and define their end market – a vital yet often overlooked part of the IoT product development process.
Defining the market requires a careful look at the who, what, when, where and why’s that are associated with the target market. There are plenty of questions to ask in these categories but below are a few example questions to ask yourself:
- Who will use the product?
- What are the user’s demographics? (age, tech skill level, location, etc).
- When is the product needed? How often is it used?
- Where will they use the product? (And just as importantly how will they use it?)
- Why does the user need the product? What need is being met or problem is being solved?
As you think through these questions, you can more carefully define your market, your users and even start to identify who potential competitors or collaborators may be. Once you have identified the target market, you can take the time to perform additional market research to understand how well your idea will be received, what price point the market is willing to pay for it and then calculate whether the idea can generate a business that is worth pursuing.
Test the most consequential assumption early: measurement accuracy, power budget, connectivity, customer demand, or production cost. Use a bounded experiment with a clear pass/fail criterion instead of treating the first working demonstration as commercial validation.
Map the capabilities the project needs: product knowledge, hardware design, firmware, mechanical design, radio or networking, backend services, manufacturing, and regulatory advice where applicable. One founder or supplier rarely covers every area.
Assign an owner to each requirement and assumption. Record the intended environment, lifetime, supported markets, and consequences of failure before moving into research and development.
Stage #2 – Research and Development
A proof of concept should answer a narrow question, not imitate a finished product. Estimate production engineering separately. There is no dependable rule that a fixed percentage of features represents a fixed percentage of the schedule.
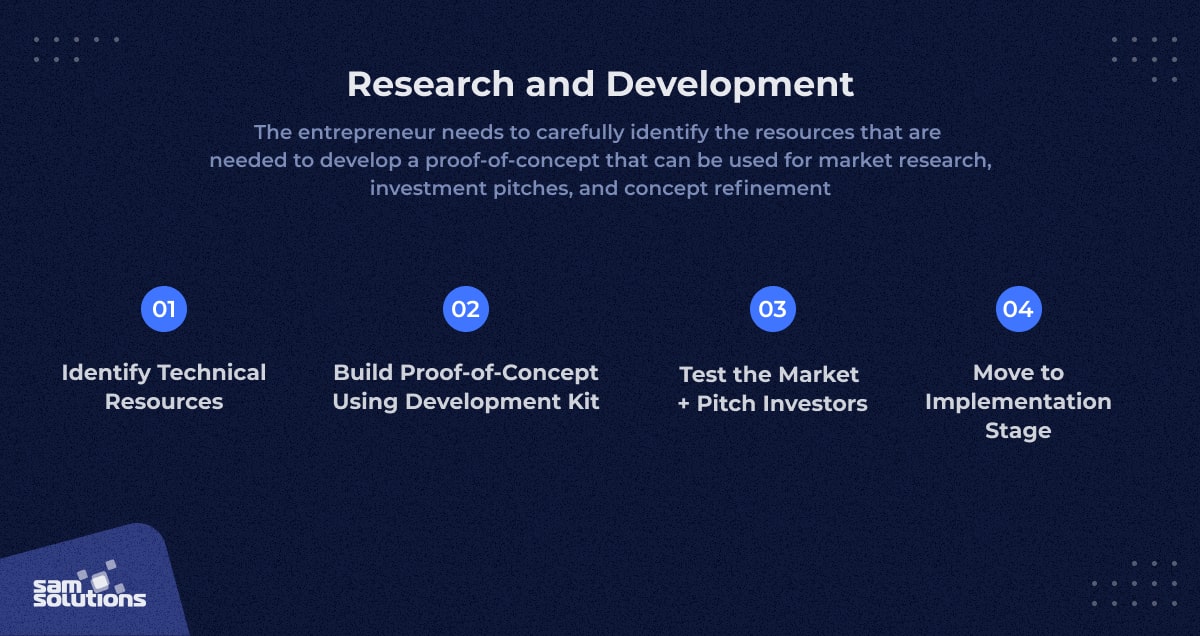
There are several steps that can be used during the IoT product development and design process to minimize costs and improve the chances for success. The entrepreneur needs to carefully identify the resources that are needed to develop a proof-of-concept that can be used for market research, investment pitches and concept refinement.
This requires identifying the skillsets necessary to build the proof-of-concept which can come in the form of the entrepreneur themselves, hiring employees or outsourcing the work to a trusted technical partner.
Keep product decisions and implementation responsibilities explicit. A contractor can build a test rig, but somebody must decide which result justifies further investment and which result stops the project.
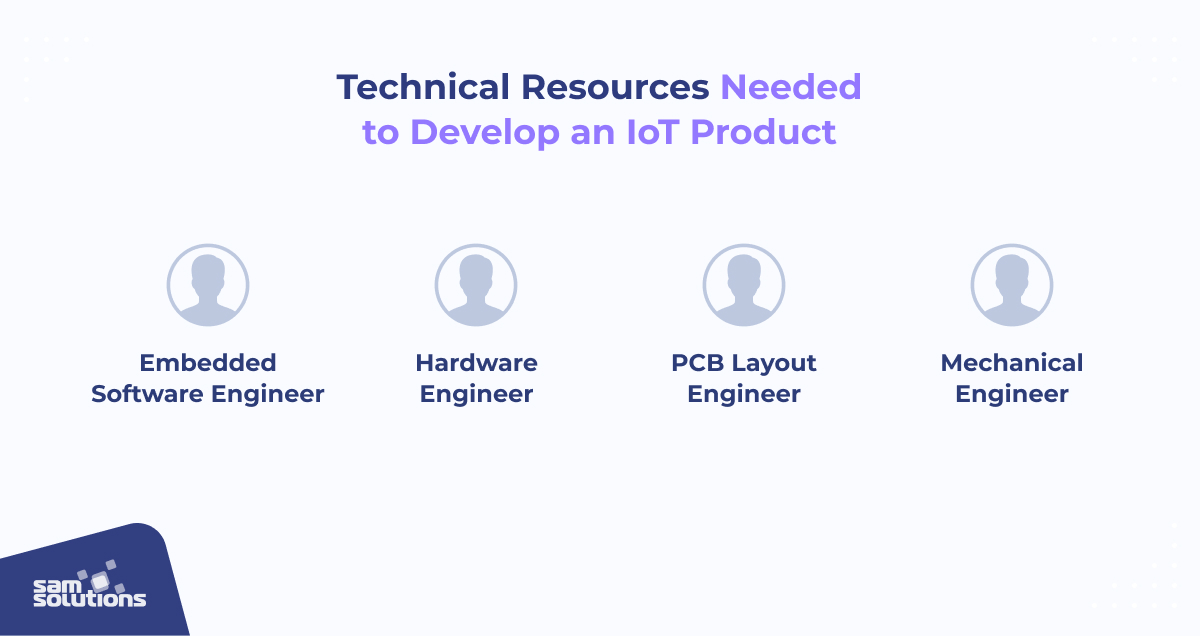
There are several different technical resources that will be needed IoT product development process. These resources at a minimum include:
- An embedded software engineer who can develop the software architecture and write the code that runs on the microcontroller.
- A hardware engineer who can identify components, develop the hardware architecture and develop the schematics.
- A PCB layout engineer who can take the schematics and build the Gerber files that are necessary to manufacture the product. On smaller projects this role is often covered by the hardware engineer.
- A mechanical engineer to design the product enclosure, create the industrial design and create a manufacturable product.
Depending on the product and the resources, it may be necessary to have more than one of each of these engineers. For IoT product development, it may also be necessary to have access to engineers with knowledge about:
- Developing cloud-based applications for storing data, performing over-the-air (OTA) updates and data management.
- Securing embedded products.
- Managing a secure device through-out the secure device life cycle.
Trying to bring all these resources under one roof out of the gate, especially during the IoT development process, can be expensive. This is why the use of contractors and strategic technology partners can help to reduce the start-up costs while ensuring that the product is designed and implemented properly.
Development kits can test a sensor, protocol, or interaction before a custom PCB is justified. They are not always the lowest-risk route: a demanding radio, safety, size, or power requirement may need specialist feasibility work first.
Development kits are off-the-shelf, pre-built hardware platforms that usually also come with software that can be used to jump start a project. Embedded systems programming can be quite complex. However, development kits can be purchased inexpensively and then wired together to get a bench top prototype that exhibits the core features (remember the 80/20 rule) and can be used to determine whether the product should move forward or be canceled.
Record what the proof of concept does not establish: battery life on the final board, production yield, certification, secure provisioning, environmental tolerance, and support cost. Treat these as separate work items rather than extrapolating a commercial schedule from the bench build.

There are several different types of development kits that can be used to develop a proof-of-concept. These include:
- Microcontroller kits for real-time applications.
- Application processor kits for more general computing type applications (often running Linux).
- Processor modules which contain all the compute power out of the box and allow just an application specific carrier board to be used (these scale to production quite easily).
- Breakout boards that are used to provide access to sensors, actuators and memory capabilities.
When selecting a development board for the embedded processor, it’s important to examine several key features of the development board which include:
- The peripherals available on the microcontroller.
- The connectors used to bring-out the microcontroller pins such as Arduino shield connectors.
- On-board sensors and communication peripherals such as Wi-Fi, BLE, accelerometers, etc.
- The mechanical form factor and how it might mount in a prototype enclosure.
In general, the entrepreneur will discover that the development boards often fall into two distinct categories; Linux based systems and baremetal / RTOS based systems. Linux based systems require a microprocessor with more horsepower such as a Raspberry PI or a Toradex module.
An embedded Linux product may use C, C++, Rust, Python, Java, or other tooling depending on its requirements. Driver support, boot time, memory, security maintenance, and update strategy usually matter more than choosing an operating system around one preferred language.
Baremetal / RTOS based systems are often used for real-time applications such as connected medical devices and real-time controllers. These can vary in complexity from simple sensor nodes to safety critical equipment. The trade-off is often performance versus cost. Linux based systems are more expensive but have more capable CPU’s and often can leverage a large array of open source software.
With all these things in place, the entrepreneur can develop a low-cost proof-of-concept product that can be used to test the market, prove to the entrepreneur the product is viable and perhaps most importantly, be used as an example to pitch investors. Once the proof-of-concept is successful and any investment has been secured, the product is ready to move on to the third stage which is the actual implementation.
Stage #3 – Implementation
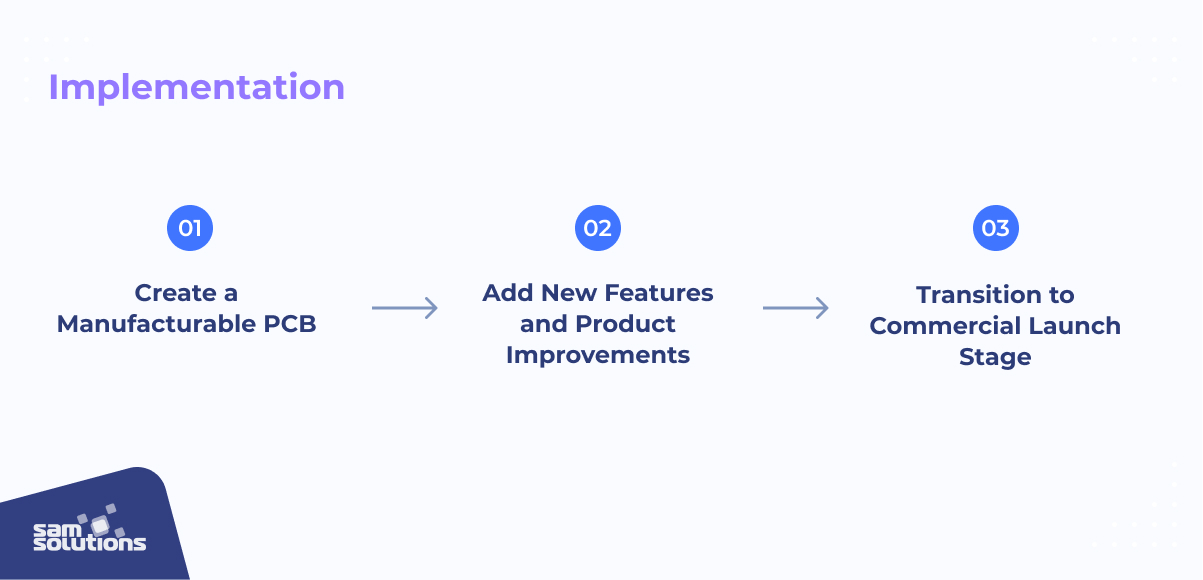
You may have thought with the proof-of-concept that the next step would be to go straight to commercialization. The proof-of-concept is usually a quick and dirty implementation that just proves out the idea.
Taking the market feedback, lessons learned from building the proof-of-concept and turning it into a real product that can be commercialized may still take quite a bit of work. The implementation phase is where the development board concepts, and software are converted into production intent hardware and software.
There are several activities that occur during the implementation phase. First, all those development boards that were wired together to create a working bench top product now need to be fully integrated together into a manufacturable PCB. It’s important to recognize that this is not a one spin endeavor.
Whenever processors and sensors are integrated together on a board for the first time there are generally small issues that come up that requiring tuning and adjustments to the schematics and the PCB. It’s a good rule of thumb to plan for at least two spins of a board. Even then that may be optimistic. Using three spins is a good conservative estimation and if things work out faster than that saves planned schedule and development costs.
In general, we refer to these PCB’s as alpha prototypes, which is the first time all the hardware components are put together on a PCB(s) and then beta prototypes which are the production intent designs.
Bring production controls into the implementation: repeatable builds, automated tests, watchdog behavior, fault logging, resource limits, and hardware-in-the-loop checks where useful. Test loss of connectivity, exhausted storage, reset during a write, and invalid sensor input. The required evidence depends on the consequences of failure.
At this stage of the IoT product development process, developers will apply marketing feedback and improve their implementation so that the software is scalable, maintainable and that it meets any regulatory requirements.
Design field updates before deployment. Verify authenticity, define a recoverable update path, and test interrupted installation and rejected firmware. Provision device identities and credentials deliberately; do not ship a fleet with a shared default password.
The NIST IoT device cybersecurity baseline is a useful starting point for device identification, configuration, data protection, interface access, software update, and cybersecurity-state awareness. Apply the relevant capabilities to the product; citing the baseline does not certify the device.
Limit optional features for the first release, but do not label missing safety, security, or recovery requirements as acceptable MVP shortcuts. Document the release criteria with the people responsible for operation and support.
Before a production run, review the design files, bill of materials, firmware image, provisioning process, test fixture, and acceptance criteria with the manufacturer. Confirm who can approve a change to any of these.
Stage #4 – Commercial Launch
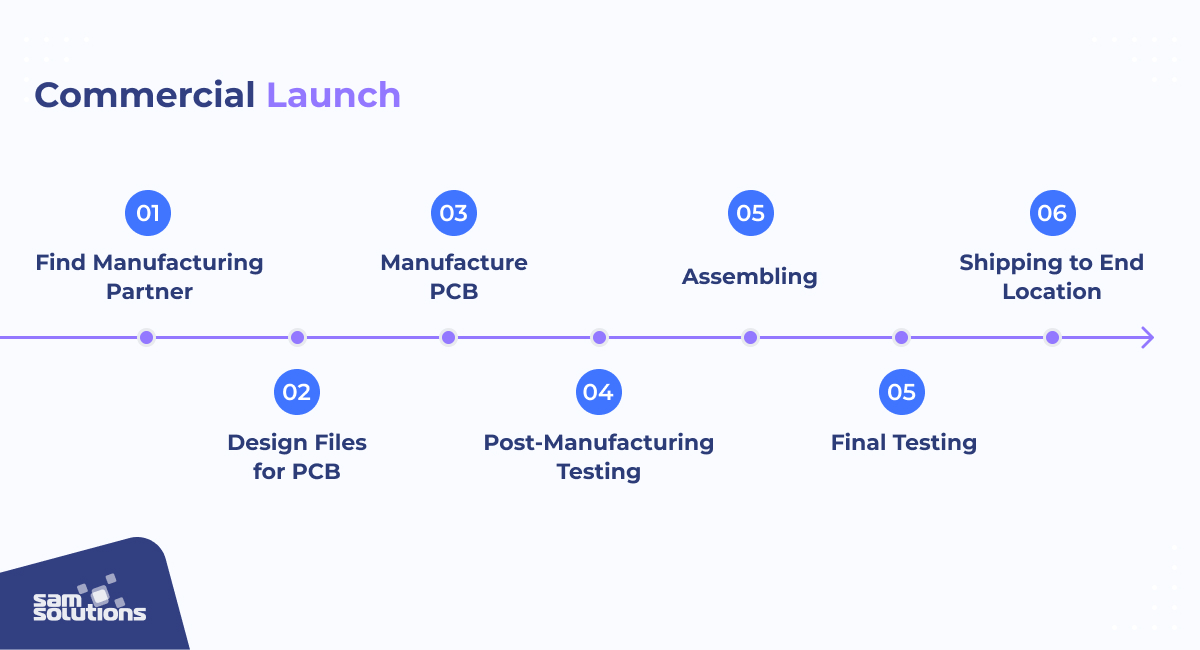
The first-time entrepreneur will often believe that as soon as their beta prototypes are complete the IoT product development process is over and they can instantly launch their product and can start to ship it the next week. Unfortunately, this is not the case.
When building a hardware-based product, the entrepreneur needs to line up a manufacturing facility that can take their Gerber files, the design files for their PCB, and manufacture them. The PCB itself can often be manufactured and shipped quickly but the bottleneck is often the facility that takes the hardware components and places them on the PCB.
Obtain component availability and manufacturing lead times for the actual bill of materials and order quantity. Allow for substitutions, test-fixture development, certification where applicable, and pilot-run findings. Do not rely on a universal ninety-day procurement rule.
Use a pilot batch to check assembly, programming, provisioning, test coverage, and traceability before scaling production. A functional engineering sample does not demonstrate a reliable manufacturing process.
When the day comes that the first line of boards is built, keep in mind that you will have to also program those boards, either after manufacturing them or having the code preprogrammed on the microcontroller or flash memory.
Define production tests from the failure risks and manufacturing process. Some products need environmental or burn-in testing; others need different screening. Record firmware versions, unique device identities, test results, and the procedure for handling failed units before shipment.
IoT Product Development Conclusions
The four stages are a planning framework, not a guarantee that development will proceed once through each step. Hardware, firmware, manufacturing, and customer feedback may force a return to an earlier decision.
Before launch, confirm not only that the device works, but who maintains it: supported software versions, vulnerability reporting, update delivery, replacement parts, and end-of-support communication. The operating life extends beyond the first shipment.
SaM Solutions is a proud sponsor of Startup Boston Week, and through our Startup Support Program we aim to help startups build their technology – all the way from idea to commercial launch.
Author

Dmitry Koshkin
Managing Director, SaM Solutions USA