Prior to Sitecore 9.1 being released, ASP.NET Identity is what was used for authentication and identity management across all Sitecore products. However, with the release of Sitecore 9.1 came the introduction of IdentitySever4 as the new identity management and authentication platform.
While this transition offers a more modern application stack (.NET Core 2.1), it’s also made things a bit more convoluted (especially if you want to deploy Sitecore to Azure). Because Sitecore 9 uses IDS via a segmented .NET Core app, while still being a .NET Framework-based platform, there’s an increased level of complexity in regards to managing the .NET Framework CMS and the .NET Core/IDS-based identity management/authentication platform. This is why we created the below Azure AD B2C tutorial, to help you acclimate to this transition.
Making the change to a .NET Core and IDS-based platform has initiated the process of transitioning from a very large, difficult to maintain app to a more manageable set of microservices that are much easier to scale.. IDS has a relatively straightforward process when it comes to adding federated authentication to it, however, the problem lies in the fact that Sitecore is close-sourced – which means that some extra steps need to be taken.
In the below Azure AD B2C tutorial, we explain exactly how to integrate Azure AD B2C authentication to Sitecore. We provide a detailed overview of creating your own connector, and how to unify IDS claims returned by this connector.
Getting Azure AD B2C Ready to Go
The first step in being able to authenticate in Sitecore via Azure involves making sure that Azure AD B2C is up and running properly. Follow these instructions to get your instance ready to go for integration:
- Create a new .Net Standard 2.0 Class Library project,
- Add global.json file to the root of your project with the following content:
{
    "msbuild-sdks": {
        "Sitecore.Framework.Runtime.Build": "1.1.0"
    }
}
- Add the following folder to your project /sitecore/{assembly.name}/Config
- Add a {assembly.name}.xml to the folder created in the previous step with the following content:
<?xml version="1.0" encoding="utf-8"?>
<Settings>
    <Sitecore>
    </Sitecore>
</Settings>
Make sure the file has its Build Action set to Content and Copy To Output Folder to Copy always
- Add Sitecore.Framework.Runtime.Abstractions, ver. 4.1.0 NuGet package to your project,
- Add Sitecore.Plugin.IdentityProviders, ver. 3.0.0 NuGet package to your project,
- Create a class called ConfigureSitecore with the following content:
using Microsoft.Extensions.DependencyInjection;
using Microsoft.Extensions.Logging;
using Sitecore.Framework.Runtime.Configuration;

namespace GitVadim.Sitecore.NetCore.IdentityServer.AzureB2C
{
    public class ConfigureSitecore {
        private readonly ILogger<ConfigureSitecore> _logger;

        public ConfigureSitecore(ISitecoreConfiguration scConfig, ILogger<ConfigureSitecore> logger) { }

        public void ConfigureServices(IServiceCollection services) { }
   }
}
- Open the .csproj file in Notepad and add the following line:
<Sdk Name="Sitecore.Framework.Runtime.Build" />
right after the first line,
Seconds Step: Preparing the Configuration
The next step of our Azure AD B2C tutorial involves updating your {assembly.name}.xml file with the following code. Use the specific values that were created during the set-up process.
<?xml version="1.0" encoding="utf-8"?>
<Settings>
    <Sitecore>
        <ExternalIdentityProviders>
            <IdentityProviders>
                <AzureB2C type="GitVadim.Sitecore.NetCore.IdentityServer.AzureB2C.AzureB2CIdentityProvider , GitVadim.Sitecore.NetCore.IdentityServer.AzureB2C">
                   <AuthenticationScheme>IdS4-AzureB2C</AuthenticationScheme>
                   <Enabled>true</Enabled>
                   <!-- BEGIN AB2C CUSTOM CONFIGURATION BLOCK -->
                   <DisplayName></DisplayName>
                   <!-- The ID of your application within the tenant -->
                   <ClientId></ClientId>
                   <!-- The name of your signup policy -->
                   <SignUpSignInPolicyId></SignUpSignInPolicyId>
                   <!-- Your ADB2C instance as https://{tenant_name}.b2clogin.com-->
                   <AzureAdB2CInstance></AzureAdB2CInstance>
                   <!-- Your tenant as {tenant_name}.onmicrosoft.com -->
                   <Tenant></Tenant>
                   <!-- RedirectURL must be {IdentityServer_URL/signin-oidc} -->
                   <RedirectUrl></RedirectUrl>
                   <ClientSecret></ClientSecret>
                   <!-- END AB2C CUSTOM CONFIGURATION BLOCK -->
               </AzureB2C>
            </IdentityProviders>
        </ExternalIdentityProviders>
    </Sitecore>
</Settings>
Third Step: Coding
While setting up a custom identity management solution can be a complex process (even for the savviest of developers), Azure AD B2C comes with built-in integration with both OAuth and OpenID (both of which have integral IDS4 support). Thanks to this built-in integration, the only actual coding work that needs to be done is setting up the proper variables for Azure.
The first step is to create a new class (for IdentityProvider), and then set it to inherit from:
Sitecore.Plugin.IdentityProviders.IdentityProvider:
public class AzureB2CIdentityProvider : Sitecore.Plugin.IdentityProviders.IdentityProvider
{
    public string ClientId { get; set; }
    public string Tenant { get; set; }
    public string SignUpSignInPolicyId { get; set; }
    public string AzureADB2CInstance { get; set; }
    public string RedirectUri { get; set; }
    public string ClientSecret { get; set; }
}
The purpose of this class is to allow Azure to properly process our requests. By inheriting the class, added functionality is created (e.g. “ClaimsTransformations”).
Next step: In order to be able to read the configuration from the {assembly.name}.xml file, we’ll define a separate class:
public class AppSettings
{
   //For convenience, we'll store the config path of our settings in a variable
   public static readonly string SectionName = "Sitecore:ExternalIdentityProviders:IdentityProviders:AzureB2C";

   public AzureB2CIdentityProvider AzureAdIdentityProvider { get; set; } = new AzureB2CIdentityProvider();
}
The static SectionName property defines the path in the {assembly.name}.xml file where our configuration should be looked for.
You’re also going to need to properly define the “Provider” property (which references the specific IDP instance you’re using).
After the settings have been properly created, you now have the ability to fully integrate with IDS4.
public class ConfigureSitecore
 {
    private readonly ILogger<ConfigureSitecore> _logger;
    private readonly AppSettings _settings;

    public ConfigureSitecore(ISitecoreConfiguration scConfig, ILogger<ConfigureSitecore> logger)
    {
        this._logger = logger;
        this._settings = new AppSettings();
        scConfig.GetSection(AppSettings.SectionName)
        .Bind((object)this._settings.AzureAdIdentityProvider);
    }
 }
Finalize everything by going to the “ConfigureSitecore” class and inputting the following changes to “ConfigureServices”
public void ConfigureServices(IServiceCollection services)
{
   var provider = _settings.AzureAdIdentityProvider;
   if (!provider.Enabled) return;
   this._logger.LogInformation($"Configure '{provider.DisplayName}' with the following setup: ClientId='{provider.ClientId}', ClientSecret='{provider.ClientSecret}', Tenant='{provider.Tenant}', SignUpSignInPolicyId='{provider.SignUpSignInPolicyId}', RedirectUrl='{provider.RedirectUri}' ");

   new AuthenticationBuilder(services).AddOpenIdConnect(provider.AuthenticationScheme, provider.DisplayName, options =>
{
   //This is required by Sitecore's implementation of IDS
   options.SignInScheme = "idsrv.external";
   options.UseTokenLifetime = true;
   options.SaveTokens = true;
   options.Authority = $"{provider.AzureADB2CInstance}/{provider.Tenant}/{provider.SignUpSignInPolicyId}/v2.0/";
   options.ClientId = provider.ClientId;
   options.ClientSecret = provider.ClientSecret;
   options.ResponseType = OpenIdConnectResponseType.CodeIdToken;
   options.ResponseMode = OpenIdConnectResponseMode.FormPost;
   //Azure AD requires us to pass the ClientId as a claim for the integration to work
   options.Scope.Add(provider.ClientId);
   options.Scope.Add(OpenIdConnectScope.OpenIdProfile);
   options.Scope.Add(OpenIdConnectScope.OfflineAccess);
        });
}
Now it’s time for compiling. If you’re able to compile without any errors, the next step is moving on to deployment and testing.
Deployment
Building code within .NET Core is performed via the dotnet tool. In order for the NuGet packages to be restored and the code to be built through CLI, the “publish” subroutine will be implemented.
Use the following command to create an artifact that’s ready to run:
dotnet publish -c Release -o C:\Temp\output_test
That command will utilize the “Release” configuration in order to build the code. The output will be copied to a specific location on your drive (“output_test” within your Temp folder).
Before you can actually deploy the code to your IIS website, you’re going to need to stop the relevant Application Pool. This is important because until the Application Pool is stopped, your site’s directory files will effectively be locked (and won’t be able to be overwritten).
After the code has been deployed, start the app pool once more, and then go to the instance login page (for Sitecore). If everything has been done properly, a new button should be located on the login form (AB2C).
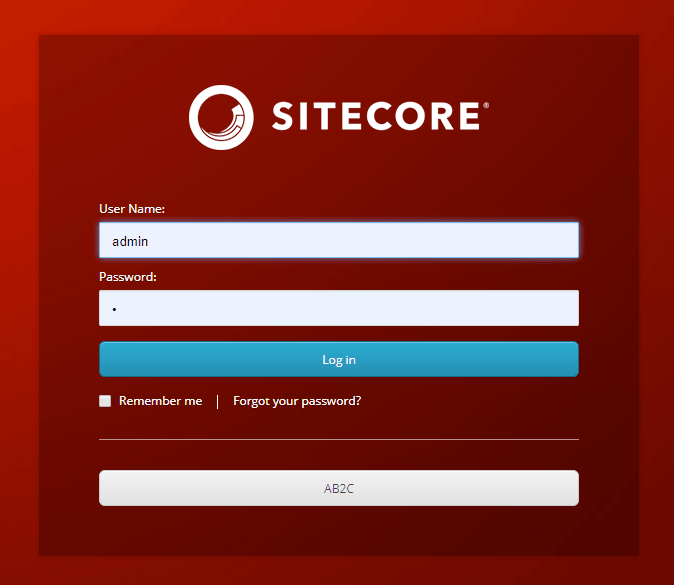
If you click the “AB2C” button it should bring you to the sign-in page for Azure AD AB2C. The next section of this Azure AD B2C tutorial covers claims transformations.
Claims Transformations
After authentication has successfully been completed, IDS will assign a “ClaimsIdentity” to the context of the current request – this object will contain all information about the logged in user as reported by Azure AD B2C in a form of a set of “Claims.”
Naturally, different IDPs can’t be expected to send every single claim in varying formats, which is why it’s necessary to unify the claims format so that it’s easier to understand from within Sitecore.
Go to your main configuration file, and then place the following snippet into a new section immediately following the “ClientSecret” node.
<ClaimsTransformations>
    <EmailClaimTransformation type="Sitecore.Plugin.IdentityProviders.DefaultClaimsTransformation, Sitecore.Plugin.IdentityProviders">
        <SourceClaims>
            <Claim type="emails" />
        </SourceClaims>
        <NewClaims>
            <Claim type="email" />
        </NewClaims>
    </EmailClaimTransformation>
    <NameClaimTransformation type="Sitecore.Plugin.IdentityProviders.DefaultClaimsTransformation, Sitecore.Plugin.IdentityProviders">
        <SourceClaims>
            <GivenNameClaim type="http://schemas.xmlsoap.org/ws/2005/05/identity/claims/givenname" />
        </SourceClaims>
        <NewClaims>
            <Claim type="http://schemas.xmlsoap.org/ws/2005/05/identity/claims/name" />
        </NewClaims>
    </NameClaimTransformation>
</ClaimsTransformations>
While Azure AD automatically returns emails with the claim “emails” – that should be changed to just “email” – with the other main change that you need to make here being switching “givenname” to simply “name”.
Sitecore only offers basic functionality when it comes to mapping claims and performing more advanced forms of processing (e.g. combining two claims to create a new claim). Functionality is limited to mapping between source claims and IDS.
So, in order to do higher-level processing work, the creation of an additional transformation class is required. After you’ve created the class, set it up to inherit from:
Sitecore.Plugin.IdentityProviders.ClaimsTransformation
After it’s been created, go to your configuration and add it to ClaimsTransformations.
In order to ensure that Sitecore is able to process your new claims, you’re going to need to add them to the following nodes in sitecore\Sitecore.Plugin.IdentityServer\Config\identityServer.config:
Settings/Sitecore/IdentityServer/IdentityResources/SitecoreIdentityResource/UserClaims
Settings/Sitecore/IdentityServer/IdentityResources/SitecoreApiResource/UserClaims
How to Let Users Bypass Sitecore Login
In order to have users log in to your website/app without going through the Sitecore log-in process, you’re going to need to add some code to your Sitecore app. So, the next step in our Azure AD B2C tutorial is to place the following config snippet into your Sitecore app:
<?xml version="1.0" encoding="utf-8"?>
<configuration xmlns:patch="http://www.sitecore.net/xmlconfig/"
  xmlns:role="http://www.sitecore.net/xmlconfig/role/"
  xmlns:set="http://www.sitecore.net/xmlconfig/set/">
  <sitecore role:require="Standalone or ContentDelivery or ContentManagement">
    <federatedAuthentication>
      <identityProvidersPerSites>
        <mapEntry name="all sites">
          <identityProviders hint="list:AddIdentityProvider">
            <identityProvider ref="federatedAuthentication/identityProviders/identityProvider[@id='SitecoreIdentityServer/IdS4-AzureB2C']" />
          </identityProviders>
        </mapEntry>
      </identityProvidersPerSites>
      <identityProviders>
        <identityProvider id="SitecoreIdentityServer/IdS4-AzureB2C" type="Sitecore.Owin.Authentication.Configuration.DefaultIdentityProvider, Sitecore.Owin.Authentication">
          <param desc="name">$(id)</param>
          <param desc="domainManager" type="Sitecore.Abstractions.BaseDomainManager" resolve="true" />
          <!-- This propery will be ignored -->
          <caption>Log in with Sitecore Identity: Azure AD</caption>
          <!-- This property will be ignored -->
          <icon>/sitecore/shell/themes/standard/Images/24x24/msazure.png</icon>
          <!-- This property will be ignored -->
          <domain>extranet</domain>
        </identityProvider>
      </identityProviders>
      <propertyInitializer>
        <maps>
          <map name="set FullName" type="Sitecore.Owin.Authentication.Services.DefaultClaimToPropertyMapper, Sitecore.Owin.Authentication" resolve="true">
            <data hint="raw:AddData">
              <source name="name" />
              <target name="FullName" />
            </data>
          </map>
          <map name="set Email" type="Sitecore.Owin.Authentication.Services.DefaultClaimToPropertyMapper, Sitecore.Owin.Authentication" resolve="true">
            <data hint="raw:AddData">
              <source name="email" />
              <target name="Email" />
            </data>
          </map>
        </maps>
      </propertyInitializer>
    </federatedAuthentication>
  </sitecore>
</configuration>
Because Sitecore uses mapEntry to decide which authentication requests will be allowed (from IDPs), adding this code is necessary for including your IDP the mapEntry identity provider list. Without adding this code, your IDP won’t be able to serve requests.
Another reason why this code edit is important is that it provides a definition for your IDP. You need to make sure that {name} after the slash in “Sitecoreidentityserver/” corresponds to the proper “AuthenticationScheme” from your IDS’s IDP settings.
Note:
The processing of all requests is still going to be fully done by the Sitecore IDP. The purpose of providing a definition for your IDP, in this case, refers to the IDP of Sitecore being able to differentiate between the two logins (i.e. – your login versus the login of your users).
In terms of your implementation strategy, this is something that needs to be given some thought – because in certain cases it might not be ideal to have all users be stored within Sitecore.
One other major benefit of including this config:
Setting the “PropertyInitializer” up to map whatever is passed from “ClaimsIdentity” to the Sitecore user. Mapping specific user attributes, as well as Sitecore groups, can be achieved through this same method.
After this config has been properly implemented, you should be able to notice the following effects:
- According to the settings within “PropertyInitializer” – the attributes of your users will update upon log-in.
- Users can sign-in to the site via a specific log-in URL
That’s it for this Azure AD B2C tutorial, be sure to check back often for other Sitecore-related blogs, tutorials, and articles.
Author
Vadim Gusev
Sitecore evangelist, Sitecore and .NET Architect at SaM Solutions. Full-stack developer with almost a decade of experience in the traditional and headless CMS world.